
Mastering the “Heel” command can be a game-changer for your walks and your dog’s self-control.
This command is especially handy for refining leash manners, particularly with lively puppies or those with boundless energy.
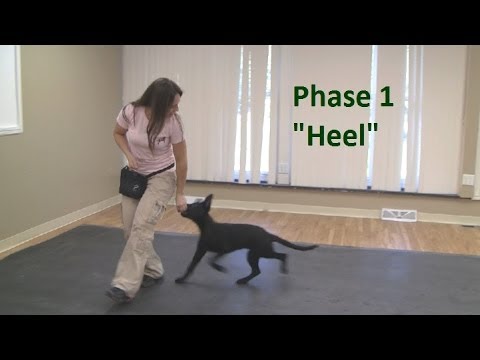
What Does Heel Mean?
“Heel” instills the habit of walking alongside you, typically on your left side.
Your dog learns to synchronize with your pace, halting when you do. It’s like a polished version of loose-leash walking and is even incorporated into competitions.
In this well-mannered stroll, your dog stays close, casting adoring glances your way.
However, the specific application of “Heel” varies. For everyday jaunts, your dog doesn’t need to march like a soldier.
Keep in mind that “Heel” is ideal for short distances due to its demand for intense concentration from your furry companion.
Why Should I Teach My Dog to Heel?
I noticed that my dog, despite not pulling on the leash, tended to take the lead during our walks, creating a dynamic where it felt like she was walking me.
If your dog tends to be a strong puller, mastering the “Heel” command can be a game-changer. It helps redirect their focus back to you, preventing distractions from the surrounding environment.
By incorporating the “Heel” command into your walks, you ensure that you maintain control over the situation, preventing your dog from pulling you down the street.
This command becomes particularly indispensable when allowing your dog off-leash, providing a reliable means to keep them close and attentive, even if they aren’t in the formal “heel” position.
While the “Heel” command is often associated with larger breeds, it’s a versatile skill that can be successfully taught to dogs of all sizes, including small breeds.
This training not only establishes better leash manners but also enhances the overall walking experience, fostering a closer bond between you and your furry companion.
For those who find bending down during training a bit cumbersome, consider using a tool like a long spoon smeared with peanut butter.
This clever setup allows you to reward your pup without the need for constant bending, making the training process more convenient and enjoyable for both you and your dog.
Before You Start
Get your hands on some delicious treats as you will need plenty of them in the beginning and separate them into tiny pieces.
Start your training in a non-distractive environment like your own home or your backyard. You can also use a clicker as the marker if your dog is already clicker-trained.
You will want your dog to have a strong release command because we will use that later.
How to Teach the Command “Heel”
The command heel consists of four key stages, the starting position, walking, distance, and distraction.
Choose the right heel position in the beginning so you won’t be switching them throughout the training process and your dog won’t get confused.
Use your dog’s neck or collar as the guideline. The neck should be positioned right beside your leg while the head is in front when walking.
It doesn’t really matter which side you choose to walk your dog on, just stick with one.
Positioning
You will want to start off by showing your dog how to position himself beside you through positive reinforcement.
Start with your dog sitting in front of you and take a treat into your left hand.
Lure your dog behind your left heel by swinging your arm around your side until your dog moves beside your left leg and sits.
Hold the treat up high so he will have to stretch his head to reach it. Repeat this step a couple of times and always reward him with “good boy” or whatever you use and feed him with treats.
If your dog turns too wide around your leg, try teaching him while standing near a wall, so he will only have limited space while passing your leg.
Movement
Start to bring some movement into the training and add the cue “heel” when you want to dog to move into position.
While luring your dog behind your left heel, make a step forward, so he will have to also move and then sit when you stop.
Once you are done with the heel give your dog his release command.
Walk & Distance
Now we want to increase the movement by walking a couple of steps forward with your dog following you beside your left leg.
When you stop, he has to immediately sit. While increasing the walking distance, make sure to give him plenty of rewards and if he gets distracted, simply get him into position again.
Once you have trained this, you can decrease the number of treats and only reward when he sits. If he doesn’t follow your open palm, try it a few more times with treats.
Increasing the duration will make it harder for your dog to follow and you will want to make sure that he has fun doing it and is not bored.
You can also add a few obstacles that you will have to move around with your dog.
Distraction
The last phase of teaching a proper heel is to add distraction to your training. Grab your leash and get outside with your dog into a semi-distractive environment.
If he fails too often that means that you have trained too fast and you will need to take a step back.
Add more and more distance and distraction over time until your dog can do a reliable heel.
If you would like to know more about each step, go ahead and watch this video which explains every part very detailed.
Advanced Heel
After you have successfully trained heel for a few weeks, you can then start to fade out the treats completely and only lure your dog with your open palm.
You can choose whatever hand gesture you like to point your dog into the heel position.
Of course, you can still treat him if you want once in a while but we only want him to be prepared for situations where you have to get him into a quick heel even if you have no treats with you.
If he can follow you around in the house without treat luring, then you can go into more distractive environments like the dog park.
Remove the leash and let him perform a solid heel with no luring and only verbal praise. If he fails that means that he is not ready for it and you should go a step back.
Problems that May Occur
Your dog may get too distracted or lose focus and break out of the heel from time to time.
Simply move him back into the starting position and reward him with treats. If he constantly fails, go back a step and really perfect every step.
Not fade out the treats too quickly and don’t get overboard with the distance and distraction. We want the dog to always succeed so he won’t lose interest in training.
Always be clear about what you expect and want from him. I love this example of how important the right communication in dog training is:
Imagine for a moment that you are training your dog to place a red toy on top of a blue one.
Continue to pretend that after your dog has (seemingly) mastered the behavior, she performs that behavior correctly 100% of the time for two weeks straight. Then, one day, your dog places the blue toy on top of the red one.
The issue is not stubbornness, nor defiance, but rather a problem of communication. Your dog may have thought all along that the correct behavior was to stack up the two toys.
Clickertraining
If he still breaks out of the heel this might be because he is simply tired. Try shorter training sessions and spread them into 5-10 minute sessions throughout the day.
If he gets bored engage with him in a short play or use play as the reward from the beginning.
Consistency and patience will get you the results that you want. If you always stick to the plan and train him every day, you will see him heel in no time.